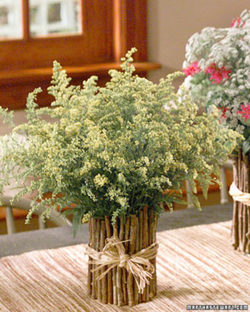
Tin Can-Twig vase or Pencil Holder
This craft is an exercise in creative upcycling!
Things you need:
Slender branches and twigs 1/4” to 1/2” thick
A clean coffee can
Burlap Fabric
Hemp twine
A handsaw
Pruning shears
Hot glue gun and glue sticks
Newspaper
Things to do:
1. Use the handsaw to cut the twigs 1” longer than the height of the coffee can. Use the pruning shears to remove any leaves or offshoots.
2. Cover the work surface with newspaper.
3. Cover the outside of the coffee can with burlap fabric. Fold in the top and bottom edges, then hot glue in place.
4. Place a twig against the side of the can, turning it to find the flattest side.
5. Run a bead of hot glue down the flat side of the twig, leaving the top 1” clean. Press it onto the can. Hold it a few seconds until it sets.
6. Test each twig in this manner to find the best and flattest fit on each one. Keep gluing them until the entire surface of the can is covered.
7. Cut the twine into 18” strands. Choose a starting point and tie the end of one strand to the top edge of a twig, knotting it in back and leaving a 5 “ tail. The loop should be level with the top of the coffee can.
8. Wrap each twig by passing the twine behind the twig then circling the front, then around to the back again. Keep going in this manner around every twig.
9. When the last twig is wrapped, tie the two ends together in back and trim the excess.
10. Fill 3/4 full of water and arrange fresh cut flowers. Change water and re-trim stems every day.
